Thursday, April 28, 2011

New Doors!

After scrimping and saving for the last 6 YEARS, we have finally replaced another exterior door. If we're keeping count (and we are), that's two doors down (replaced), only 1 more to go.

This picture makes me cringe. It was taken when we bought the house in 2005. Yup, it was a lovely peachy-pink house with an addition wrapped in white siding. I still cannot believe we bought this house.

The wooden door was old, probably original to whenever the past owners (there has only been one other owner of our home, the builder himself) added this addition to our house (maybe late 70s?). The exterior door was cracked, splintered, peeling and broken. It never closed easily, leading to many escapes by our lovely Miss. Penny Sue.
Isn't she adorable? That's why we forgive her.

Last winter, the storm door glass was shattered in one of our many wind storms last. And that's when we realized how poorly the door insulated us from the VERY cold winter.

So, we called our contractor friend (who also replaced our windows) and placed an order for a new exterior door that would provide both light and privacy. The door leads directly into our master bedroom, so privacy was very important. We had to wait about 6 weeks for our contractor to install, but he's absolutely worth the wait!
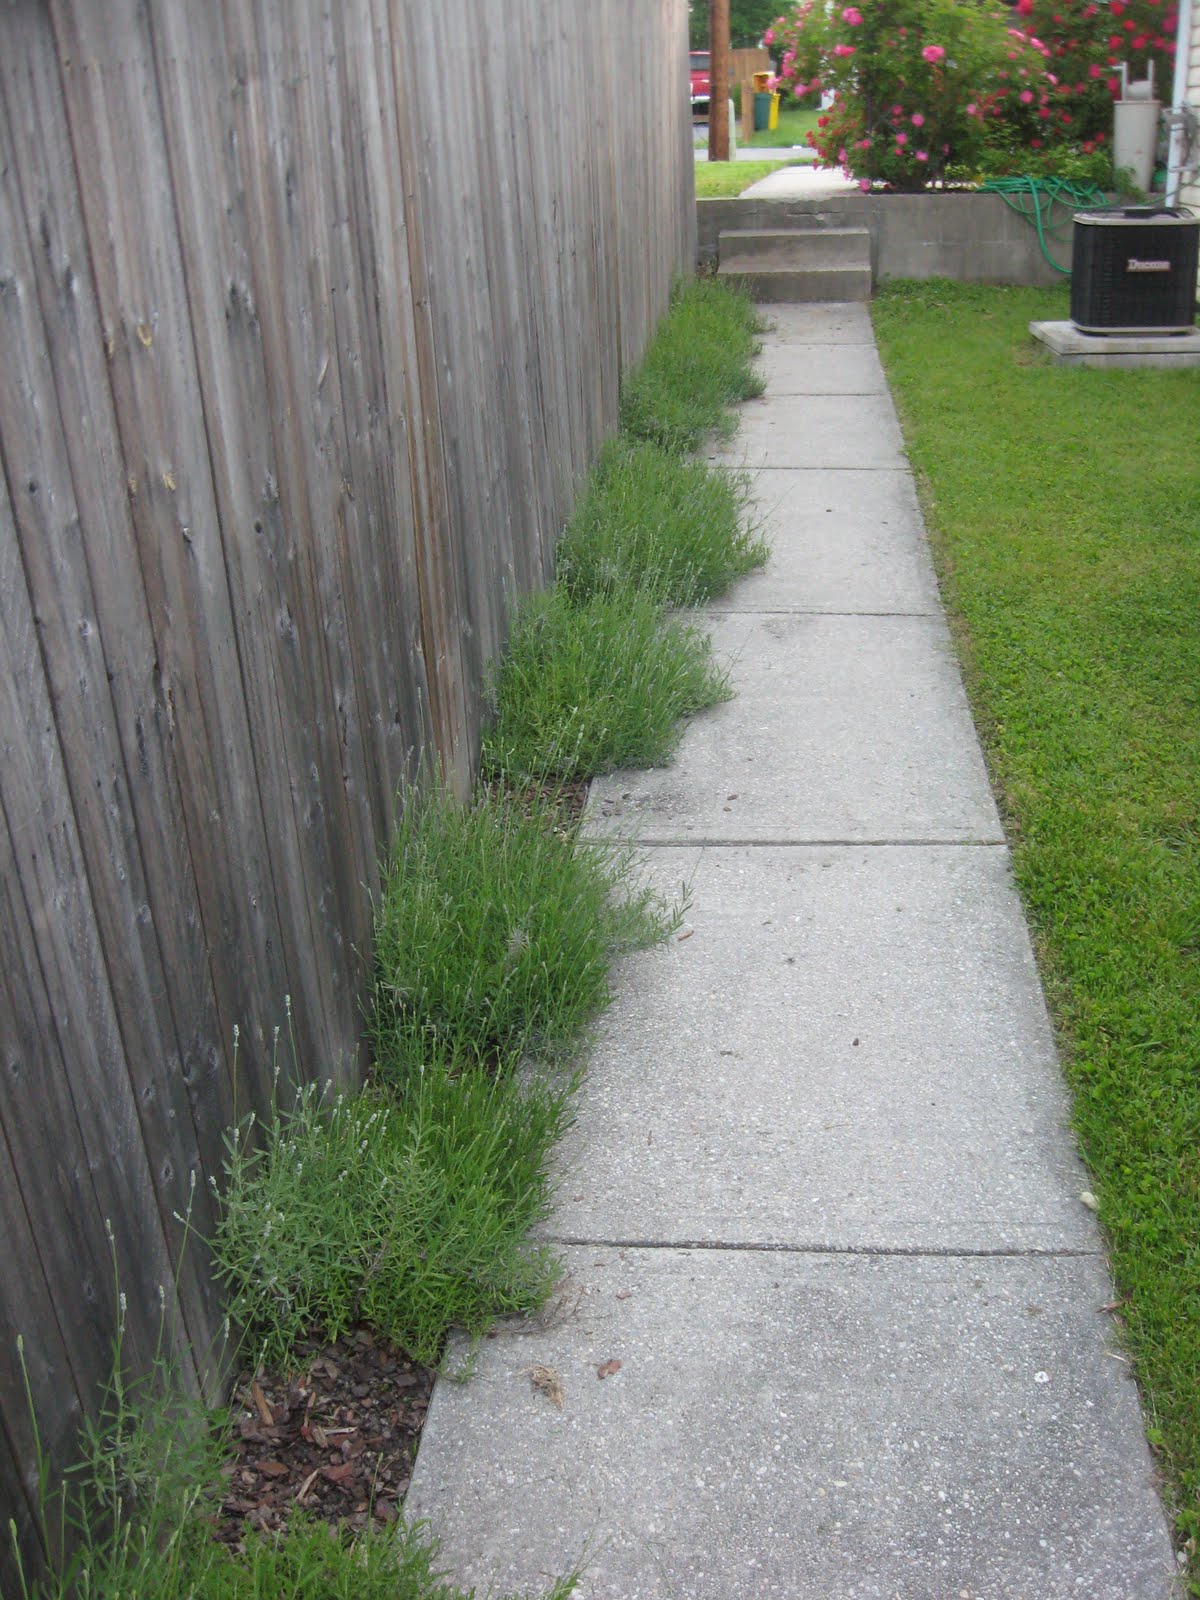
You can see that we had vinyl siding installed and added a cute little iron bench. Directly to the left of the door is my beloved herb and rock garden. It appears that a gladiola sneaked into the herb garden as well.
We selected a green door (to match our front door), with a full grid of windows. We also chose to have the glass frosted, again, for privacy reasons. I know I could have found curtains for the door, but I didn't want to have to do this. We selected antique bronze door knob set and door bell also to match our front door. I love consistency in a house. I'm weird like that. It explains why both of our bathrooms have the exact same tile and wainscoting. I digress.


Now we have a pretty door that keeps us warm at night, is solid and not cracked!
I still cannot get over the difference a little door makes!

Saturday, April 23, 2011

Happy Easter


Have a wonderful Easter Day, full of of dyed eggs, marshmallow peeps, chocolate bunnies and most importantly a day full of our Lord, Jesus Christ.

Tuesday, April 19, 2011

Mission Private Bathroom: Complete

The bathroom is finished! The bathroom is finished! Well, 95% finished (because nothing is ever 100% complete in this house) and I am so happy with the results. Come on in and take a look!

Here's what I started with when we bought the house 6 years ago. The tub and tile is original to the house (1966). I didn't hate the tile, but it was pretty cracked, so it really had to go. Oh, and did I mention there was no electrical outlet? Where's a girl to plug in her hairdryer?
This is the only before picture I have. It's circa 2007. Turns out, I hate taking pictures of ugly.

Two years ago, we had the tile removed and replaced with a neutral tan tile, new tub, sink and toilet replaced and wainscoting installed. Yes, I hired this job out because my husband was deployed overseas and I didn't feel confident replacing old plumbing. After witnessing all the problems the professionals had, I'm very glad I didn't bother. Gosh I'm getting sick of wainscoting. Probably because I read way too many decorating blogs, but it's going to stay. I originally painted the walls light blue, but never removed the window into our laundry room. Honestly, the bathroom was never completely finished. Until now, that it!

And here it is today.


Our first step was getting the exhaust fan installed. Cost of the exhaust fan was around $115.00. Installation (no, we do not diy electrical anything!) was around $280.00. The electrician was here four hours-2 hours longer than anticipated, so the $280 was very inexpensive for his time!

Quite a nice change from the gaping hole (which I did patch myself thankyouverymuch!).

Step two, was to patch the cracks in the ceilings. The ceilings had been patched a time or two and I knew cutting a hole into the ceiling to install the exhaust fan would cause the cracks to resurface. I was right. Fortunately, only 1 coat of mud and 1 round of sanding did the trick.

Then, I took a hammer and knocked out those shutters leaving us even less privacy. I was hoping this would spur hubby into action. Alas, his school work (yes, I got me a college man) was too much, so I had to wait for our window to be covered.

Yes, that is the view from my bathroom looking into my laundry room/bedroom closet. This room also needs MAJOR work. Let's ignore that for the next year now.

So, I moved onto the fun part, painting. I painted the ceiling (gah!) ceiling white by Olympus. It's a splatter proof brand that we've used it the rest of the house, It's not as white as most ceiling paints I've used in the past. For the walls, I used Valspar's Brooklyn Brownstone paint in a semi-gloss finish. I am in love with Valspar paint. The walls only required two coats of dark brown to cover the light blue. It looks just like chocolate pudding, too! The trim was painted brilliant white (more leftover trim paint) and I didn't touch the wainscoting that was already white.

Finally, hubby stepped in and patched the window. It only took two days of constantly interrupted work, but he finished it. I caulked and painted it in one night because I was so excited to be done.

I'm not sure what I'm going to put in that niche. we're considering a shelf, a monograph or a picture. Putting little ceramic knick knacks isn't the best idea because this bathroom is for my kids , my very active kids. So, I'm leaving the niche blank for now until I come up with a better idea than a vase of flowers.

And for your viewing pleasure, a few more shots of the bathroom.
I used lime green accents to tie it into the adjacent room (the family room).

The ubiquitous Target bird picture. I bought this picture and it's mate from Target several months ago. Turns out, so did everyone else. I've seen it pop up on several decorating blogs in the last month alone! The blue bird picture is currently found in our family room (for now).

Now, if you'll excuse me, I'm going to enjoy some private time in my newly decorated bathroom.

Monday, April 18, 2011

You Should Try Herb

One of my favorite gardens (yes, we have more than 1) is my herb garden. I love to mix the herbs in my rock garden.

Herbs are the easiest plants I have ever grown. I just plant them in small bed next to the foundation of our house and watch them grow-that's it! I always recommend herb gardens to new gardeners looking to plant something edible.

Most years, I plant a variety of chamomile, parsley, sage, oregano, chives, rosemary. I once planted lemon balm and now it will not go away. Never, ever plant anything from the mint family (lemon balm is from the mint family). It's aggressive and invasive. It now grows between every plant and side walk crack in our yard (and likely the neighbors yard). Sure, it makes a nice tea that's good for digestions, but no body's digestion is that bad!

I have often found that my simple little herb garden yields more lemon balm herbs than my family needs. So, I like to pawn it off on my poor unsuspecting friends, neighbors and co-workers. But beware, handing people a baggie of dried herbs may not look so good (or make you the most popular neighbor on the block!). I always dry my herbs using a simple method. I get up in the morning and clip my herbs after the morning dew. Next, I wash and pat dry the herbs and put them on a cookie sheet. I bake them in the oven at a very low temperature (like 200 degrees) until they are dried (usually about 2 hours). I package them in baggies. I really need to find a more legitimate looking container.

Finally, I wanted to share a picture of my lavender row from last year. Lavender is so very pretty. Unfortunately, I have a neighbor who spared the perimeter of his yard with some sort of grass/weed/any living thing killer and every single one of my lavender plants died. I managed one harvest from the plants but couldn't bring myself to use or give them away since I didn't know what my neighbor used to kill the plants. He's a little grouchy, so I avoid asking him anything. And really, he didn't do anything wrong. I still dried them as practise because I do plan to have lavender again, just not in a garden bordering my neighbor's yard.

To dry lavender, I cut them at the height of their blooms, put them in bunches and tied them with dental floss. Next I hung them to dry in a dark, well ventilated room. I actually use this method for my other herbs too. Either method works well.

Friday, April 15, 2011

Kitchen Art, or Refrigerator Not Needed

Recently, I was struck by inspiration. I love when that happens! I love kid art and I love encouraging my kiddos to create, but putting artwork on the refrigerator got to be very overwhelming. Do you realize how much art kids bring home from school? It's insane! On a few blogs, I noticed cork boards hung full of children's art and thought this the perfect solution for our family. I present you with my kitchen cork board.

This awesome cork board not only holds many examples of my children's artwork, but it also frees up refrigerator real estate. No longer do I have to worry about opening the refrigerator fearing an attack of paper (or twelve). This cork board allows for easy rotation of art and less mess since it's not moved until I move it intentionally! Last and certainly not least, this rotating art feeds my need for constant change and lots of color!

I made this cork board using:
1. 1 Giant Frame bought at Michael's (with their 40% off coupon): $12.00
2. 6 Cork squares $10.00
3. Blue spray paint $3.00
4. Caulk $1.00
5. Hot glue had on-hand

This project almost beat me. I couldn't find a pre-made cork board big enough, so I used a large picture frame without the glass. However, once I hot glued the cork to the cardboard backing and hung it up, the cork sagged away from the top of the frame. My problem was that when I replaced the glass with the cork board, the frame no longer fit together very well. See that sagging? It was ugly. It was also proof that a this board wasn't going to hold up to rotating pictures.

Enter my new BFF, caulk. I caulked around the back side of the frame filling the the gaps between the cardboard and the frame and let it dry overnight. Finally, no sagging (well, at least no sagging cork board).

Master Bedroom Makeover that Turned into a Bathroom Makeover

Two weeks ago, I decided that I tired of looking at our fugly master bedroom and vowed to do something about it. This room, has been the most challenging to decorate in our house so far and it doesn't even have plumbing or electrical issues! Well, maybe it sort of, indirectly does.

This is a tale of project creep.

Our master bedroom was a disaster. We ripped up nasty carpet and replaced it with laminate flooring, oh back in July and never put any of the baseboard moulding back.

We put laminate flooring in the entire bottom floor of the house. Since this was the very last room, it was full of toys, exercise equipment and general nastiness. Unfortunately, last month, we has a major toilet leak that pretty much ruined all the new flooring in our bedroom. Oh well, time for plan B-carpet. Hubby and I were done with laminate and less than impressed with how it's held up, anyway. Yes, I am fickle.

You can see that the room is paneled and has cheap-y built-in bookshelves. In another life, this room was used as a family room, a toy room and an exercise room, but we wanted to sleep on the same floor as the kids, so this room became our master bedroom. That and we couldn't fit our furniture in the other 12' X 13' rooms in the house. Oh, the joys of an older homes-no master bedroom!

Typical of me, I never did take a picture of the master bedroom set up as a bedroom. In case you weren't aware, I suck as a blogger (as if my lack of posts wasn't already a big clue).

Finally, I decided to make our bedroom something that didn't embarrass me. One of the many problems with our bedroom is that it has a exterior door to our back yard. People are always walking into our house through that door. I don't know why our friends and family can't use our front door! At least the UPS guy does!

I painted the walls (using paint I already had), and caulked/painted all the trim white. For the record, caulking is hard! It looks so easy, but causes so much flipping mess! Hubby finally finished installing the moulding (all 7 pieces). I even made curtains (using stitch witchery) because long panels didn't fit with the chair rail height shelf found on 2 of the 4 walls (I hate that shelf!). We even had a new door and windows in stalled. The room was looking good, or at least, much better then what it had looked. The final step was to install carpet. And that's where I ran into problems and project creep.
1. Before we can get new carpet, we have to fix the plumbing and flooring issues in the master bedroom closet. FYI-this closet houses our washer and dryer.
2. Before we can fix the flooring/plumbing in the master closet, we have to remove/replace some walls.
3. And while we are removing/replacing walls, we might as well remove/cover-up the window that looks out from our master closet directly into one of our bathrooms. Yeah, privacy is a problem. I mean, it was great that I could fold laundry and watch my kids bath at the same time, but that time is fast ending and we all would really like some privacy when using that bathroom.
4. Before we cover that interior window, we need to install an exhaust fan into the bathroom because there is no other ventilation in that room.

Gah! That's where I am now. I'm working on the bathroom, so I can work on the master closet/laundry room, so I can finish up my bedroom makeover.
The plantation shutters in the pic is the window that looks out into my laundry room. While it looks like it provides some privacy, it doesn't really. There is one slat missing and it cannot be replaced (not by someone of my skill level anyway). The location of the missing slat is in the perfect position for viewing any and everything which is why I can watch my kids while doing laundry. Additionally, sounds are not muffled at all (if you know what I mean!).


Oh, see that hole? Yeah, I had to patch that 2 years ago. I know that as soon as we cut a hole in the ceiling to install an exhaust fan, the patch will crack and have to be repaired. I like repairing drywall almost as much as I love to caulk. I'm about as skilled too.

I should mention that these bathroom pictures are more than 2 years old. We have since had tile and bead board installed. So, it's much, much nicer, but not great. Hopefully, it's about to look great!

New step #1. Work on bathroom

So, let the games begin. I'll be showing my progress (I promise this time) on each of my steps (no, really).

Tuesday, April 5, 2011

Rain Rain Go Away

But PLEASE come back another day! 'Cause rain is certainly welcome for the gardens that i have yet to replant!

Two months ago, the husband and I agreed to replace the back exterior door (located in our bedroom) and and install a storm door on the front door. Our contractor has been trying to schedule the install for 2 weeks now, but rain delayed it. We are really looking forward to the new exterior back door. The original door is splintered and doesn't close correctly. We've been living with this monstronsity for, oh six years now. The storm door was shattered in a wind storm during the winter months. We have no insulation with the door, so all the warm air is going out the door. It's been a cold month!


Let's hope for a sunny day this week. Hey, plants need sunlight too!

Monday, April 4, 2011

Permission to Paint

A few years ago, my mother gave me a beautiful antique dresser. Well, it may not be a real antique (100+ years old), but it's clearly old and came from a distant relative. I love the lines and the crystal looking knobs so much that I ignored the chips on the sides and slightly raised laminate on the dresser top. For years, I used this dresser to store our cloth napkins and craft supplies. And it was good. "But not really" (name that children's book!).
Enter my love for painted furniture. I love painted furniture. Heck, I love stained furniture, when the furniture is in good shape. But alas, my poor little dresser is not in good shape. My problem was that while my mother gave me this lovely dresser, it came with strings. I was to care for this dresser as she would; read treat it well and NOT paint it! I hate furniture with strings. Sadly, I have a house full of furniture with these strings.

So, I called my mother and professed my love for the the little dresser. Then, I casually mentioned that the laminate top was lifting a bit and glue alone wasn't going to make my dresser look any better. Well, maybe it would have, but I didn't know that for sure. Finally, I flat out asked if she minded if I painted the dresser. She reluctantly said that she gave me the dresser and I can do with it whatever I want.

Before she could change her mind, I ran out to Lowe's and bought primer, paint, poly and paint brushes. Selecting a paint color was harder than I anticipated. Usually, I am fearless when selecting a paint color. I originally wanted a lovely blue or green to compliment my peacock window treatments. Then I realized that the window treatments were the focus of the room and I didn't need anything competing with them. I may or may not have polled some of my friends. So, I decided it would be between white or black. To be honest, white furniture isn't really me. I like it, especially for bedrooms, but it doesn't really fit my personality. White furniture always seems to says "light and airy" or "beachy" to me. I'm neither light nor airy. Well, maybe I'm beachy. So, black was it.

I sanded, primed and painted that little dresser in one evening. And I LOVE it. I didn't want to poly it in the house and the weather has since turned rainy, so that will have to wait. In the mean time, I've love the results. But the big question was would my mother like it. Yes, at the age of 33, I still crave my mother's approval. My mother also has excellent taste and is honest. I love that about her.

As luck would have it, my mother came for a visit within the week and ended up loving the dresser. Not only that, she complimented me on my stellar painting skills. She seemed surprised. I don't know why since I help her paint her walls all the time. So not only did I get this great looking dresser, but I also got kudos from Mom too.

So, without further adieu, my new dresser.

After seeing the after pictures, my lovely sister suggested that I paint the chairs black. While I agree that it is a great idea, painting all those spindles makes me feel less than inspired. So I think I will wait on that project. Don't you just love how one projects lead to another?

Linking up!