Whew. Painting cabinets is no joke. This time consuming, multi-step process has had our house in chaos for OVER THREE WEEKS. Finally, FINALLY the cabinets are done! Those who have already painted cabinets can sympathize; those who haven't just cannot understand. I didn't understand!
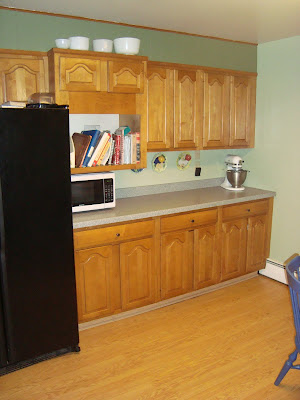
Here's a sneak peak of the kitchen with the cabinets painted, the knobs installed and doors (mostly) reinstalled. 
After reading and reading and reading blogs on how to paint cabinets, I finally decided that I wanted to use Benjamin Moore Advance Paint in Linen White. Great, right? Wrong? Do you know how many stores sell this line of paint? Not so many. After visiting 4 stores that sell Benjamin Moore paint and calling a few more, I finally found one about 25 minutes from our house. I drove up to the local hardware store after work one afternoon and was fortunately to score their very last can of Advance Paint in Satin.
After reading and reading and reading blogs on how to paint cabinets, I finally decided that I wanted to use Benjamin Moore Advance Paint in Linen White. Great, right? Wrong? Do you know how many stores sell this line of paint? Not so many. After visiting 4 stores that sell Benjamin Moore paint and calling a few more, I finally found one about 25 minutes from our house. I drove up to the local hardware store after work one afternoon and was fortunately to score their very last can of Advance Paint in Satin.
Why did it take 3.5 weeks to finish this up? Remember, I have to do this at night after work and after the kiddos are settled down for the night. The work breakdown is below:
Day 1-2 Clean cabinets with TSP and remove doors from cabinets
Day 1-2 Clean cabinets with TSP and remove doors from cabinets
Day 3-4 Sand cabinets and doors
Day 5-7 Prime doors and cabinets
Day 8 Didn't get to do anything
Day 9 Sand all the doors and cabinets
Day 9 Finally find and buy paint
Day 10-11 Paint coat 1 on cabinets and doors
Day 12-13 Paint coat 2 on cabinets and doors
Day 14 Do nothing-no time!
Day 15-16 Paint coat 3 on cabinets and doors
Day 17-20 Do nothing while paint on cabinets/doors cure
Day 21-23 Drill holes for new knobs/rehang cabinet doors
Day 24 Stand back and admire all the work
I am so glad that is done. Again, here's a peak at our progress.


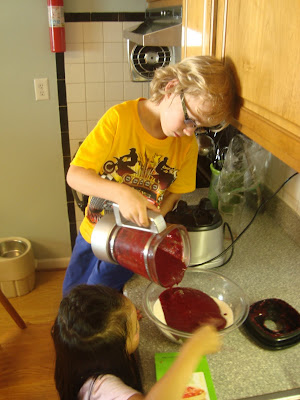
 Now, my children walk to the back of our little yard and pick berries.
 Often they just pop them into their mouths (yes, before washing them). When they notice that there are a lot of ripe berries, they run inside, grab a bowl and start collecting them. They even recruit me to help. Since we are all different heights, we are good at finding all the ripe berries!
 We picked these yesterday. This bowl made about 4 cups of crushed blackberries.