Friday, December 30, 2011

Covering an Old Window

One of the many joys of buying an older home is finding out where the original house ended and additions began. In our house, inefficient, oddly placed windows were the tell-tale sign. Until last spring, we had a window in one of our bathrooms that looked directly into the laundry room. And while this was very convenient when I wanted to watch my kids bath while I did laundry, it left a lot to be desired when someone had to actually use the toilet! This year, we turned that window into an adorable little wall niche in the bathroom. I'm still thrilled about it and our new found privacy!

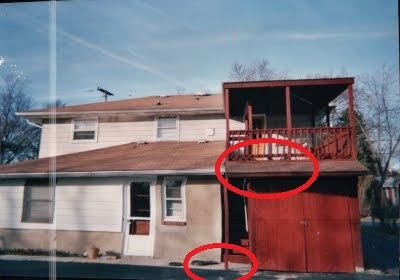
The second window we decided to address was the window in our basement kitchen (yes, we have 2 kitchens) that looks into the children's outdoor toy storage/garage. Last year, we replaced all the windows in our home with new energy efficient windows except this window. Best $10K we ever spent on this house! Why replace a window that we would rater just get rid of, right?
In this picture, we are removing all the flooring in the basement to replace it with laminate flooring. But, you can see the window that looks out into our toy storage room/garage/garage door. It was just ugly. Okay, so the entire space is awful in this picture. Doesn't it always look worse before it gets better?

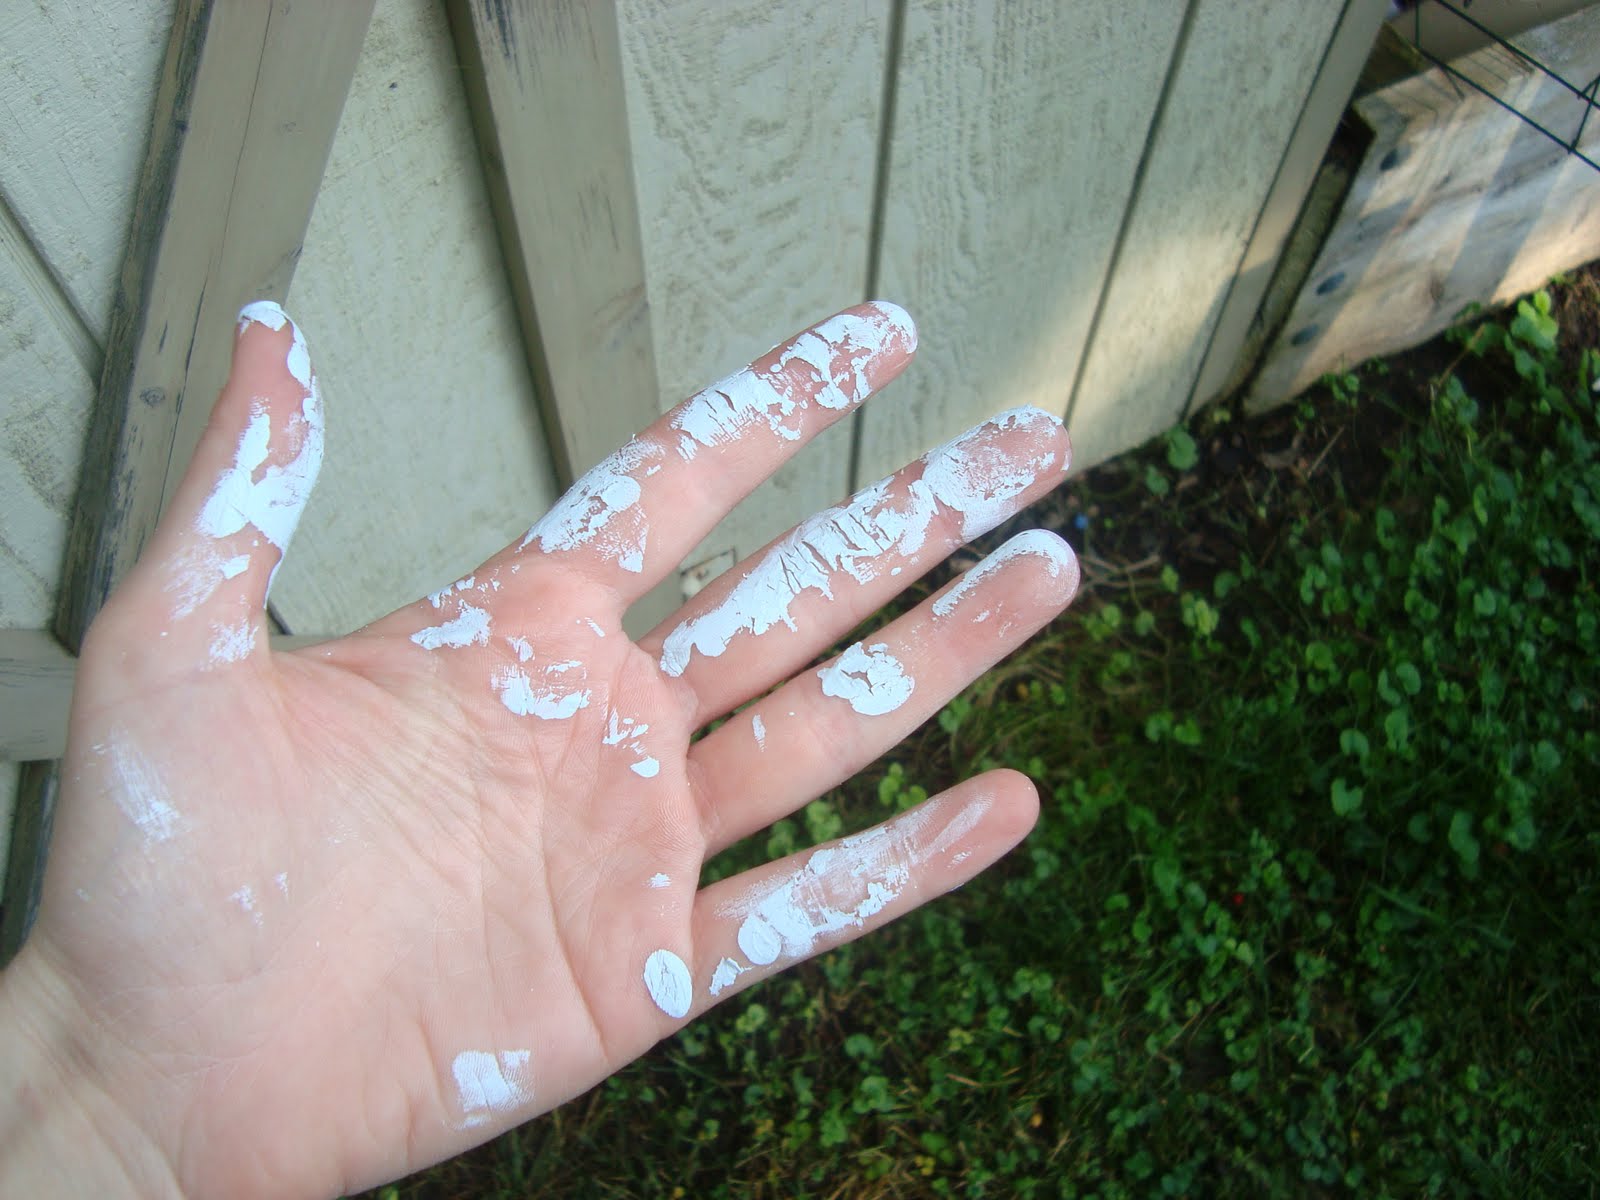
Since funds were pretty low (like non-existant) after repairing all the water damage this year, we had to get creative. First, Carl patched the window with extra plywood we had from an old daybed. Between the plywood sheets, he added insulation and Great Stuff for insullation.
After putting in the plywood, we realized how dark the room looked. The kitchen is in the basement, after all. We agreed that adding a mirror to this space would look great. But, having a mirror cut could be expensive. A look at craigslist and our local second-hand stores didn't yield anything in our price range either. So, we began looking through all our junk and spied this!

We were no longer using the hutch portion of this dresser and decided to store it. The mirror was a perfect fit for the space. So, Carl popped out the mirror, glued it into the space and added some moulding to secure it in and to look nice. Here's how it turned out.

I painted the tile backsplash white. Yes, i painted the ceramic tile. I'm not that concerned because we never use this kitchen. I decided not to paint the cabinets (for now) because they are in excellent original condition. These cabinets are original to the house. So, they are approximately 50 years old. They have a very mid-century feel which works well with the rest of our theme in the room. They polished up beautifully too! Honestly, I hate the light fixture globes, but Carl loves them and they match the family room rug, so they will stay. I added some lime green accessories like towels, rug and a clock to tie the color scheme into the adjacent room.

As I mentioned before, I never style pictures because I just don't have the time/desire. This is how it looks every day (we don't use this kitchen much). I always keep a cutting board out (because I am obsessed with cutting boards!) and the dogs messed up the carpet. Oh, and I usually walk around the house in a red apron and my hair a mess. We are beyond pleased with this project. Now, we can spend time in our family room kitchen without viewing the old, ugly and inefficient window. This old house is slowly becoming one that reflects our family.

Thursday, November 10, 2011

And We're Done-Bedroom Complete!

Both the roof and the basement have dried out and been repaired. Since the last update, the small roof over our garage has been completely replaced and we've had a french drain and sump pump in the master bedroom. Finally, we were able to move onto fixing the flooring situation in room.

About 18 months ago, we ripped out the old nasty carpet and installed laminate flooring throughout the entire bottom floor of our house (summer kitchen, family room, hallway and our bedroom).


Our bedroom, pictured above was the last room to get the laminate flooring. It doesn't usually look this bad. This is the middle of a construction zone.

We finally got the laminate floor in and... I hated it. In the pictures, it doesn't look bad. However, I just didn't love it for my bedroom. It reminded me that this room wasn't supposed to be a bedroom, it was supposed to be a bonus room or family room. And because I didn't love it, I didn't blog about it. I didn't spend much time in it either.

When we had the french drain installed, Hubby and I had to remove the damaged laminate floor. After two weeks of walking around on cold, gross concrete floors, I was ready to start pricing carpet. I knew what I liked, and I knew my budget ($500-$600), but the two didn't agree with one another. Isn't that always the way?

We have a large dog who's nails snag, so I knew Berber wasn't an ideal option. We have Berber carpet throughout much of the house and I am always trimming the snags. I like the new shag carpeting, but it turns out it's not in my budget. I looked into installing carpet tiles, but the mixed reviews scared me away. That, and it wasn't really that much cheaper.

The one thing I did know is that I wanted a brownish tan carpet with no pink undertones. Pink undertones with our yellow and green room just doesn't look great.

I got three estimates on carpets and found one that I liked the best for the least price. It is a brown plush/shaggy style in browns. I even managed to get it installed for under $600.00, $589.00 to be exact!

Two weeks later, out carpet was installed and I am in love! I love the soft cushy feeling under my feet!

Here's some pictures below of the room with new carpet. You won't find perfectly styled rooms on this blog. I have a bit of an aversion to knick knacks, and prefer items have functionality. This is why my bookshelves contain books that are read very regularly. I like a styled bookcase as much as the next person, but it's just not going to happen in our house.

This room is a blend of old and new. The dressers and night stands belonged to my parents and are at least 50 years old. The bed came from my grandmother. The lamps and picture are all Goodwill finds. We painted over the old paneling. We even reused some of the old laminate flooring in front of the door. Since the windows have ledges under them, curtain lengths had to be customized. Floor to ceiling curtains, unfortunately, just could not work. I make the curtains using discounted fabric and stitch witchery. The new items in the room include bed linens, door, windows and window treatment fabric.

Finally, I can relax in our bedroom.


Thursday, October 27, 2011

That 1%

I haven't blogged many projects in a few months because we've been working on boring house maintenance and repair work. But, thinking back, that's an interesting and important topic to write about as well, so here goes.

The mid-Atlantic area has been hit with rain, rain and more rain for the last few months. Everywhere we look housing are experiencing major flood damage. Unfortunately, we own one of those houses. The situation is so bad that when we called to get someone in to look at our flooding problem, we had to wait, get this, a month just to get someone out. And that's if I received a call back at all! On the positive side, we had time to save our $$ to pay for the repair.

We actually had two major problems.


Using an old picture, I've illustrated the areas damaged by water. I'm being generous. The circled items are just where the damage originates. We have way more damage than just in the circled areas.

Problem #1: First up is the small roof above the garage. You'll notice that the back of the house has no gutters (why, I don't know). Because of this, water was falling off the deck roof directly onto the roof below. Water was trapped inside this roof causing all the wood to rot inside. This was not evident without removing the XXX. I discovered the damage when a sheet of wood fell inside the shed because the structure holding it in rotted. Goody. Ironically, the shingles had no damage.

So, we needed to replace this entire roofing structure. Despite being a repair cost of at least $1,000.00, this project was actually too small for most roofing companies to bid. These guys are so busy, they are turning work away! We got a total of 2 bids. One was more than double than the other. We selected the lower priced option because this company actually provided a solutions to the problem in addition to replacing the roof. They will be installing a gutter system above the deck. This will be done this week!

Problem #2: This addition in the back of our house contains our master bedroom and laundry room. Every single time it rains, both rooms are flooded. The water originates from the corner I've circled. I should mention we just put in new flooring in our master bedroom less than 1 year ago and now it's ruined. After months and months, we finally had a professional in to assess the situation. Turns out that 99% of houses like ours (a raised ranch/bi-level, split foyer) do not need a sump pump. Looks like we're that 1%. We felt so special. The solution is to install a french drain that leads into a sump pump in this back addition. This too will be done this week.

So, looks like these projects will be done soon, and I can work on (and blog about!) fun projects. I can't wait!

Saturday, July 9, 2011

Herbs Take 2

I may have mentioned a time or three that I love our herb garden. Herbs are not only pretty, but they also are edible!

Sometimes, the herbs in our garden grow a little more than I anticipate. Last week, my mother asked me when I was going to weed my garden. I had already weeded, but the herbs began to encroach onto the sidewalk and look kind of, well, weedy.
I promise, these are herbs-chives to be exact!

I occasionally give herbs away, but I find that a lot of people do not really want them. And we have more of some herbs that we will every need, so I just trim them back. I hate tossing the clippings in our compost pile; it seems such a waste. So, I decided to start using them in vases in our home.

Currently, we have a glut of oregano. This plant has a beautiful little white flower and has that wonderful oregano smell. So, I cut oregano until I found the sidewalk again, washed the plant well (because they attract all kinds of bugs!) and threw them into a kicky little lime green vase.
I didn't add water because I figured the oregano could dry on our table and I could just pull off little leaves as we need them when cooking. How's that for practical decorating?

Thursday, July 7, 2011

Blackberry Jelly Time!

As a child, I remember walking down our long rocky driveway on hot summer days and picking blackberries with my sister. Sometimes we'd eat them, occasionally, we'd bring a basket of fruit home with us, but most of the times, we had blackberry fights. Now, I'm mortified not only for the stains, but the total waste of food. Oh well. The memories were good. I wanted my children to have similar memories. So, my husband planted 6 berry bushes along our back fence. Now, each summer, we are rewarded with raspberries and blackberries. The blackberries really are the star of the show. They are huge-sometimes over 2" long, super sweet and plentiful.


Now, my children walk to the back of our little yard and pick berries.
Often they just pop them into their mouths (yes, before washing them). When they notice that there are a lot of ripe berries, they run inside, grab a bowl and start collecting them. They even recruit me to help. Since we are all different heights, we are good at finding all the ripe berries!


We picked these yesterday. This bowl made about 4 cups of crushed blackberries.


After the berries are collected, we bring them inside, wash them and make freezer jam. I think this is their favorite part!
There's just something about picking something that you grew and turning it into something for your family to eat. I hope my kids think back fondly on these activities one day. I know I already do.

Wednesday, July 6, 2011

Simple. Ha!

About a week ago, I noticed that one of the fluorescent bulbs in one of our kitchen light fixture was dim. So, I decided to replace the bulb. However, changing the bulb didn't do the trick.
This isn't the light, but it's what the light looked like. This picture is from our downstairs kitchen. Same light, different location, both ugly. You get the point.


Now I had a decision. I could:


A. Try to fix the old, ugly florescent light box, or


B. Go buy a new one already

After consulting with the husband who apparently hated the light fixture (who knew?), I drove on over to Lowe's to check out new light fixtures. I had a few criteria in mind when shopping.


  • Not the light box florescent type of light

  • No pendent lights. This fixture will be directly over the kitchen sink/counter where we stand frequently. I am tall (6'0) + we have ceilings that are not high. Consequently, pendent lights, if they don't hit my head are just uncomfortable hovering just over it.

  • We'd like a darker color such as black or oil rubbed bronze to match out other light fixtures (but I wasn't afraid to paint if I found something

  • Inexpensive-as in under $50.00

  • Both hubby and I had to like it

I quickly found a much more updated, non florescent light box type fixture for $40.00. It was the last one in stock and it was originally $59.00, so I snagged it.

This isn't the exact fixture, but it looks similar. See it fit all my criteria!


I was excited when I arrived home, so I wanted to install the new light right away. I turned off the electric (always a good idea!) and went to work removing the light fixture. Imagine my delight to find not one , not two, but THREE holes hidden under that box. Only one of the holes was needed for the electrical wiring. The other two were just delightful little surprises. Since the new fixture wouldn't cover the holes, I now realize that I have to patch the ceiling.


Which means...


I have to now patch and paint the ceiling. Ugh. I hate painting a ceiling. Furthermore, I am incapable of painting a ceiling without getting little splatters all over the walls. So, I'll also have to touch up (at a minimum) the walls and pray that the colors still match. This simple little fix was turning into a total room makeover.


After a minor attitude adjustment, I realized this was not a problem, but an opportunity to tweak a kitchen that I have never, ever been able to get quite right. This kitchen has been 4 colors in the last 6 years. The rooms has been cream, colonial blue, yellow-green and light gray-green. After reading tons of blogs and advice online, I *think* my problem is that I was using muddy colors next to my gray counters, white trim (originally stained) and white/black tile. The result was a bit gloomy


First things first, I had to start at the top, err the ceiling that is. I patched the holes. I just crumbled up some paper, stuffed it into the holes and covered it with mud-a neat little trick my father taught me when I was 16 years old! And what do you know, it covered pretty well! A little sanding later and I was ready for to paint the ceiling. Finally, 3 days after trying to fix the original light, my lovely husband hung the new light fixture!


When we flipped the switch to the light, we were astounded at how bright our kitchen became. Hubby suggested we get lower wattage bulbs and I agree... when these burn out that. We really like the new track light fixture. It does a lot to update our outdated space for very little $$.

Next stop, painting the walls because I splattered ceiling paint on them. Fingers crossed, new paint will help brighten up our kitchen even more!

Saturday, June 25, 2011

Oops! Paint, I LOVE YOU!

I always have good intentions to finish one project before I start yet another. Yet, sometimes I just cannot pass up a deal. Then, I get so excited by said deal that I have to start the new project as soon as I get home.

Case in point, last weekend, while buying crack sealer at Lowe's, I happened upon the Oops paint section. I have no clue how I ended up in this section, but I did. Imagine my delight when I found a lovely aqua paint in my favorite brand-Valspar Ultra Premium in semi-gloss. It was the exact color I wanted to paint my daughter's dresser. And it was only $5.00.

Here's the dresser before.

My mother found this dresser (along with a matching vanity and night stand) at an estate sale for around $125.00. She didn't notice that it was pretty stained up until after she bought it and loaded it onto the truck. That was no big deal. The bedroom set was in fantastic shape otherwise.

Finally, 10 months later, I stumble upon the aqua paint. And the next day, I painted the entire set. Here's the after.
I left the handles as is because the mirror and headboard match and I was undecided on which way to go. I love how it turned out.

This was by far the easiest piece of furniture I have ever painted. I just sanded it, primed and painted it with two coats and used a roller. That's it. Now, I just have to finish decorating my daughter's room. I'm so close now, I can just see it!

Linking up!

Wednesday, June 22, 2011

New Neighbors

About two weeks ago, we had a new family move into the house across the street. As soon as I saw the For Sale sign come down, I prayed that a nice family with kids would move in. We have a lot of older neighbors, and wanted a family like ours to join the neighborhood. Well, the good Lord heard my prayers and I spied a lovely family with two young children bringing in moving boxes.

I wanted to go over there and introduce myself right away, but for some reason I hesitated. I'm not particularly shy, so why hesitate? I am embarrassed to admit that I am often paint covered and filthy from working in the yard.
See, this is just my hand from our playhouse project a few weeks ago.

While doing yard work, my kids often join in and are equally filthy. Okay, they are just plain gross. Even I can't deny that!

I have yet to meet a new neighbor for the first time when I wasn't gardening. True story, my husband unexpectedly arrived home one day from his year long deployment overseas only to find me knee deep in our compost pile. That's right, not only was I covered in dirt, but rotting food too. I can't believe he didn't run away terrified. But at least he's seen me dirt free where as the new neighbors have not. I did not want the neighbors to think that my family was the filthy stinky one.

Finally, I realized that being stinky is not nearly as bad as unfriendly. And if I wait until the kids and I are clean and they're home, we'll never meet. So, one day after my run (because at least I wasn't actually covered in mud), I noticed they were home. I grabbed some freshly baked banana bread and walked up to their house. I let the kids ring the door bell so I could stand back a little (so the smell didn't hit them right away).

Thankfully, the new neighbors were too polite to say anything about my less than lovely appearance and welcomed me into their home. The family is a wonderful family with two small children, just as I hoped for. I cannot wait to get to know them better!

Sunday, June 19, 2011

What I've been Working On

What exactly is this? This is a hot mess that's what!To be more specific, this is an old dresser that is part of a bedroom set belonging to my mother (additional pieces include a vanity and headboard in equally bad shape). Unfortunately, my mother had to put this little dresser, who once upon wasn't such a mess, into storage. Even more unfortunate is that her storage unit flooded ruining majority of her furniture. It was awful to see beautiful wood furniture warped and pealing beyond repair. Many of the items held sentimental value to her. This dresser was one of those items that had more sentimental value than monetary value. While old, it was made from cheap pine and laminate. Fortunately, the water damage, while bad, wasn't impossible (for me) to repair. None of the wood was warped, but the laminate was pealing. This I could work with!

So, I've been working on this dresser and the matching vanity for the last two months. Yes, I am that slow. I've been peeling, stripping, patching and sanding these pieces over and over and over again. I'm not going to lie, this project hasn't been easy. And had it just been for me, I would have just scrapped the thing. But I'm working on this for my mom. Hopefully, when she sells her current home, she can find a place in her new home to fit her precious family antiques.

Here's a sneak peak of the project so far. I think this shabby chic paint job is kind of interesting, but I know my mother would hate it, so this is an in-between peak. More to come!

Happy Father's Day!

To my wonderful, husband, have a happy, fun-filled Father's Day. We love you!

As is typical, I waited until the absolute last minute to worry about a Father's Day present that shows how much we love and appreciate my husband. And by last minute, I meant Father's Day morning at 6:30 am.

After casually asking what he would like for breakfast (at 6:00am), I headed out to the grocery store to pick up his request item-cereal. Yup, I can and was willing to make whatever he wanted for breakfast, but he wanted cereal. So, I sneaked out this morning and bought his favorite cereal-Cinnamon Toast Crunch. I even splurged on the name brand! To round out the order (and because I haven't been to the grocery store since we returned home from vacation), I also added
  • 1 dozen collousal-sized donuts (it really was cheaper by the dozen) freshly baked
  • 1 bunch of bananas
  • OJ
  • Fresh Milk
  • Freshly ground coffee
  • 1 bunch of assorted flowers
Then, I quickly scribbled a card together and added it to the table of food. I think he enjoyed his carb feast!

Goodwill Finds!

I often browse at our local Goodwill, but rarely buy anything. I'm pretty picky what comes into our house and I rarely buy anything I wasn't looking for already. For example, I am currently looking for
1. Picture for our bedroom
2. A few lamps for various rooms in our house
3. Butcher block table top

Imagine my delight when I walked into Goodwill and found this delightful little oil painting that matched the colors in our bedroom perfectly! It's signed and dated 1983!
It's a bit brighter in person which I really like. Our room is a bit dark and had a lot of hand-me-down 70s furniture. The picture matches the style of the bedroom perfectly! I paid $8.00 for the oil painting.
Next, I found this lovely floor lamp with a fantastic milk glass shade. I love milk glass and buy milk glass serving bowls for daily use for serving food and displaying in our kitchen. The base is also pretty heavy in comparison to many of the floor lamps I find in thrift stores(or regular stores for that matter!). I paid $15.00 which is what our Goodwill charges for all floor lamps

This lamp is perfect for our bedroom as it provides a light source for us as soon as we enter into our room (there are no light switches).

And finally, I found this adorable little desk lamp. I've got a few ideas on where to use it, but for now, I'm still undecided.
I paid $4.00 for this little beauty.

Notice that my lamps were antiqued gold? I am so glad this color metal is coming back. While I like the chrome/pewter look that we've all seen in the last trend, it matched nothing I owned (unless you include our faucets). Yeah for old becoming new again!

Monday, June 6, 2011

The Playhouse Part 6: The Budget

Like all home projects, we set a budget for the playhouse project. I set the budget at $300.00 Sounds kind of expensive, doesn't it? I thought so, but dang, good quality exterior paint is expensive (and worth the extra $$ IMO).

So, here's the cost breakdown (rounded)


Exterior
Paint $74.00
Plants/Potting Soil: $66.00
Planters $25.00
Trellis $12.00
Furniture $28.00
Mulch: Free
Total Cost (Exterior ONLY) = $205.00

Interior
Primer $50.00
Exterior Paint $52.00
Deck Stain FREE (previously on hand)
Curtain Rods $3.00
Furniture: Free-(previously owned)
Accessories: Free-(previously owned)

Total Cost (Interior ONLY)= $105.00

Total Cost of BOTH Exterior + Interior =$310.00


One of the reasons it's taking us so long to update our lovely home is that we are slowly saving for all repairs and paying in cash (or check as is usually the case). Since we were already over budget by $10.00, we decided that the extra little touches like trim mouldings (or gingerbread), hooks and mailbox could just wait. The kids don't miss them, so why should I. Rest assured, as soon as we update the playhouse, I'll provide a new after picture.

Exterior Cost $205.00. Interior Cost $105.00. Years of fun and play for the kids, priceless.

Sunday, June 5, 2011

The Playhouse Part 5: Painting and Decorating the Interior

Mr. A and Miss J.
You are invited to tea in The Playhouse.
Tea, strawberries and sweets to be served.
Come one, come all, come NOW!


Located at
The Playhouse
1443A Whitington Avenue
Xwwwww, XX, 55555

(Conveniently located in the backyard)

Hope to see you there!


This is the invitation the kids found stuck to the front door after lunch on Saturday. They cautiously made their way to our backyard. After a minute or two of looking around, they found the place!
Cautiously opening the doors, the kids found a delightful surprise-their very own playhouse! Come on in and have a look! As a reminder, this is what we started with.


And here's the surprise that awaited the kids when they opened the doors!
Green tea, strawberries and black bean brownies, oh, my!


Storage shelf with helmets, their adored pillow pets and plenty of space to add their own little decorating touches (which they already started to fill).
Outdoor toy box that doubles as extra seating. Favorite stuffed animals, Teddy and Sprinkle joined the tea party too!


The kids enjoy their afternoon tea. They were so excited, they didn't even eat the brownies!
Miss J takes it outside to enjoy a quiet cup of tea on their "patio".

Now, the kids are begging to take every meal out in their new clubhouse (their term) and to sleep there overnight. Too bad my less than youthful back refuses that treat. From the hours of silence hubby and I now have in the house, I'd say this project was a great success.


The Shabby Nest

Saturday, June 4, 2011

The Playhouse Part 4: Painting and Landscaping the Exterior

Wouldn't you know it, as soon as I decided to paint the exterior of the playhouse, the heat climbed to over 90 degrees. It's a good thing I love heat! After slathering on a ton of sunblock (because I burn and worry about wrinkles), and donning my painting cap, I tackled the exterior painting. My poor hubby isn't as heat tolerant, but still stepped up to help with the painting-thanks, Honey!

Two gallons of yellow and 1 pint of green paint later, and the exterior painting was done! I used the Valspar Duramax Semi-Gloss paint color matched to our house (called adobe cream by the siding manufacturer). Great paint. It was pretty expensive @ $37.99/gallon, but I understand it's excellent paint and we shouldn't have to repaint next year. While I was at it, I decided to finish the landscaping too.

Welcome to the new playhouse!
We added a hook and hanging basket on the right hand side of the doors and two barrels of flowers on either side of the doors. We wanted to be cautious of planting anything on either side of the doors just in case someone swung the doors a little too wide. We also added the address "1443A" above the doors.

On the right side of the house (side closest to our home), we turned the worm bin/yard compost into a vegetable garden. This little box contains 3 types of tomatoes and 2 types of peppers. I wanted to plant strawberries, but they are going out of season. Strawberries as also much more expensive then the vegetables plants! Having a garden for our kids is very important to us. We want them to see first hand where produce is grown. I have fond memories of picking fruit in the summer as a child and want my kids to have similar memories.

Directly next to the vegetable garden box is a little place to rest. We added two little green lounge chairs for relaxing and a metal and mosaic table for drinks. Behind the chairs, we added a trellis and a clematis plant. The clematis is still pretty small. Hopefully, it'll grow, grow grow this summer and be nice and full by summer's end. The trashcan next to the chairs is actually our potato experiment. We're growing potatoes in that can! And behind that bin is still our compost bin. This bin will stay since it's the only place in our yard that's appropriate (aka far enough from the house) for a compost bin.
On the left side of the playhouse, are the raspberry, blackberry and kiwi bushes. We just love going out to the yard and picking a few berries to sample! Don't you love the old clothes line pole? We only have one (left from the previous owners) and love using it for climbing plants. I think it's charming! You can also see one of the two windows here. I love the little green shutters. They are such a great little accent! The kids and I mulched the entire area from playhouse to fence for ease of access. My son is, at this very moment, planting sunflower seed along the edge of the house here. I cannot wait to see them grow!

We're still looking for running trim (or fretwork, or gingerbread) to go along the roof edge, but it's pretty tough to find. I also don't want to pay $60+ for a 4' section. It's only a playhouse for goodness sakes! I also want to add a small mailbox. I haven't found exactly what I'm looking for just yet. I'll find it eventually, I'm sure.

This run down little shed has come a long way, don't you think?


Next week, I'll share the interior and how we surprised the kids (who had no idea we were turning the shed into a playhouse). The interior, in my humble opinion is the best part of this makeover!

LINKING UP!
The DIY Show Off